|
|||||||
 |
|
|
Εργαλεία Θεμάτων | Τρόποι εμφάνισης |
|
#32
 26-01-2013, 14:48
|
|||
|
|||
|
Απόσπασμα:


|
|
#33
29-01-2013, 10:56
|
|||
|
|||
|
βγάλαμε άκρη,,,,,,,,,,,,,,,,,,απο εδω,,,,,,,,,,,,,,,,,,,,,,,,
μετεξεταστέος δεν νομίζω να μείνω  ") ο μεγας...JimVonBaden  ... αγορασμενα απο εδω και εδω ... αγορασμενα απο εδω και εδωQD Change Pictorial! As promised, I changed out my quick disconnects and added the clamps on the female bosses for the quick disconnects. The following is a pictorial on how it was done. Please feel free to use it, or not, for your personal use. 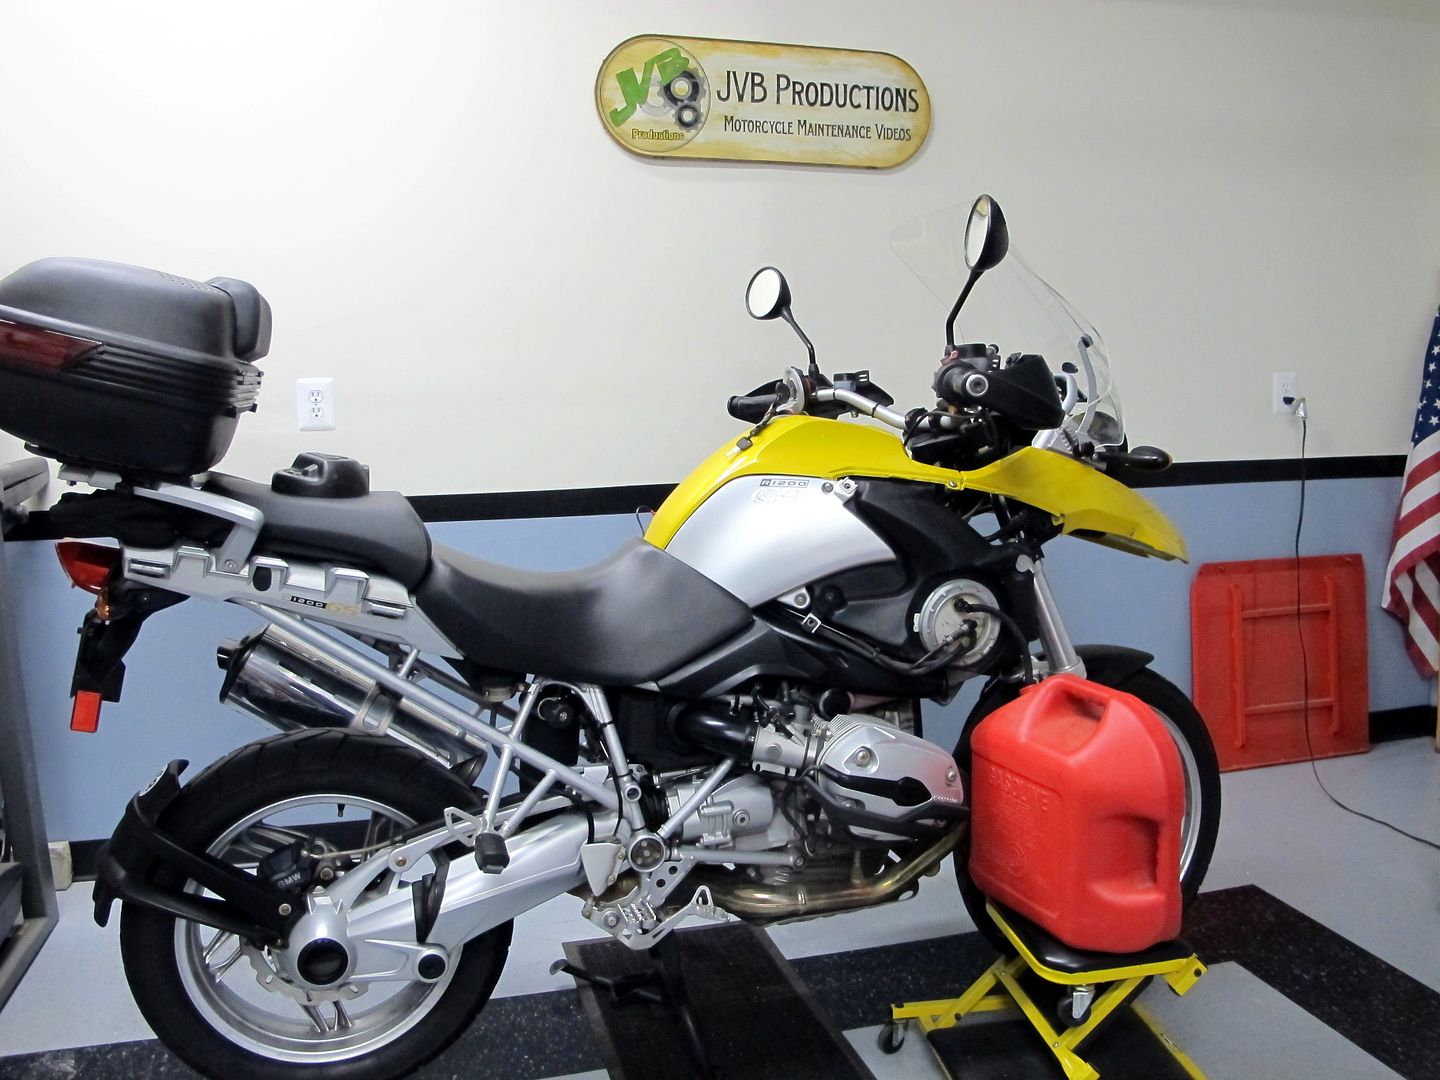 Needless to say, I had a full tank of gas when I decided to do this. I used an old male QD and length of hose to drain the tank. On the 05-07 there is a QD on both the left and right sides, two QDs on the 08-09 left side. The process is the same no matter which bike you have. 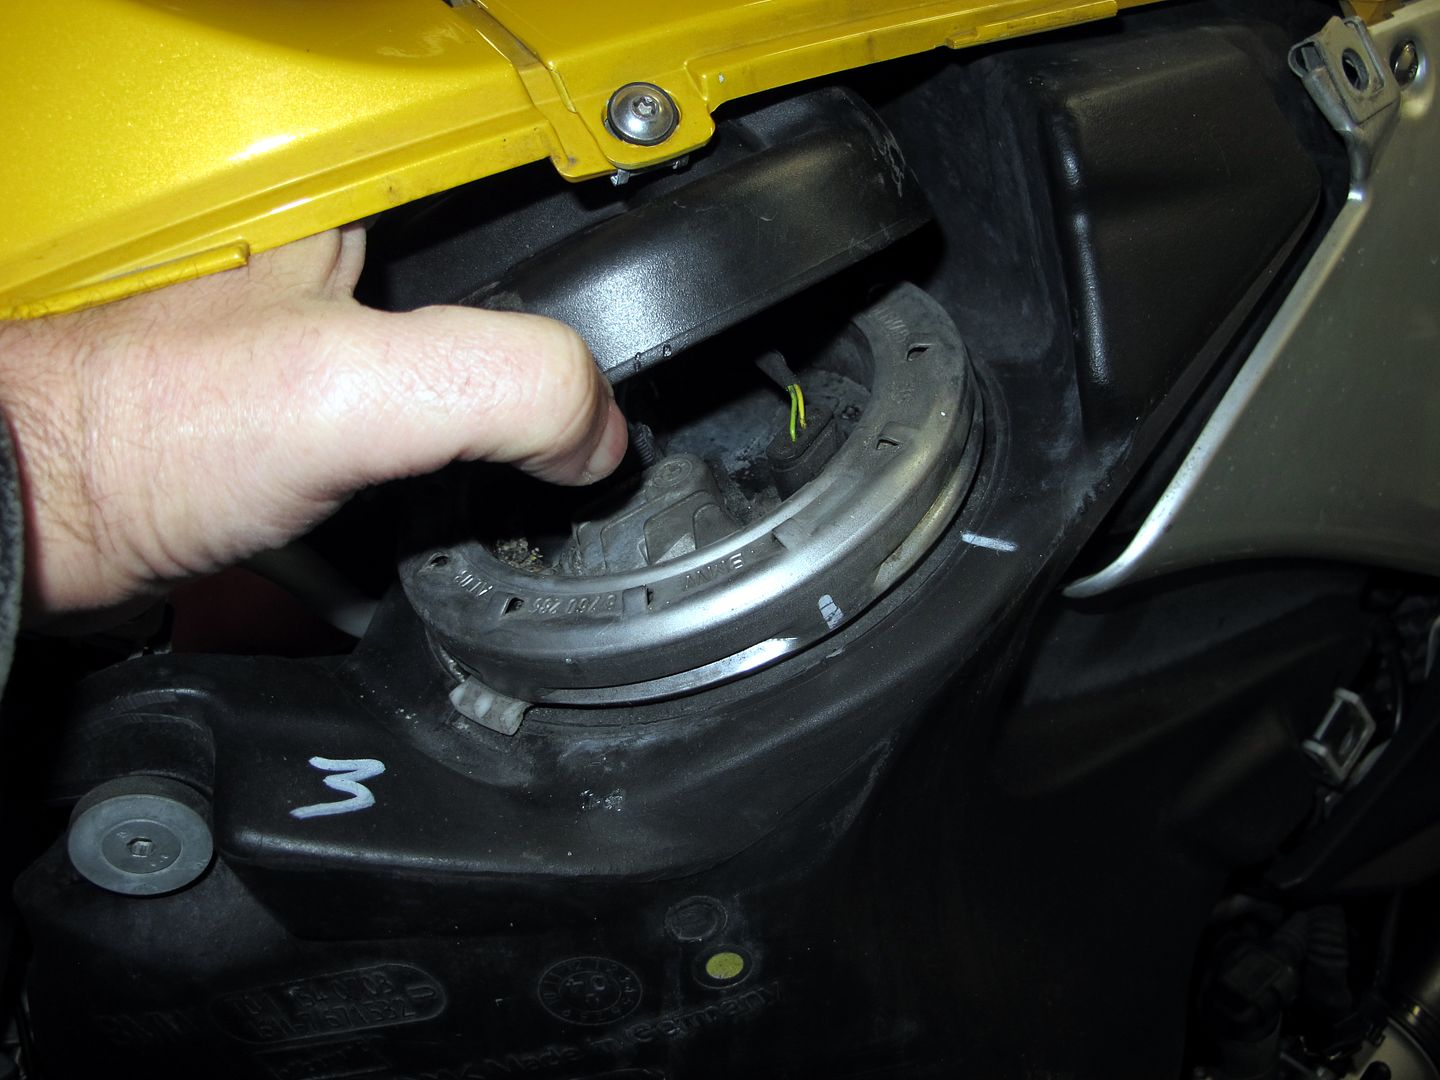 Starting on the left side, remove the large side cover, then the fuel pump cover. 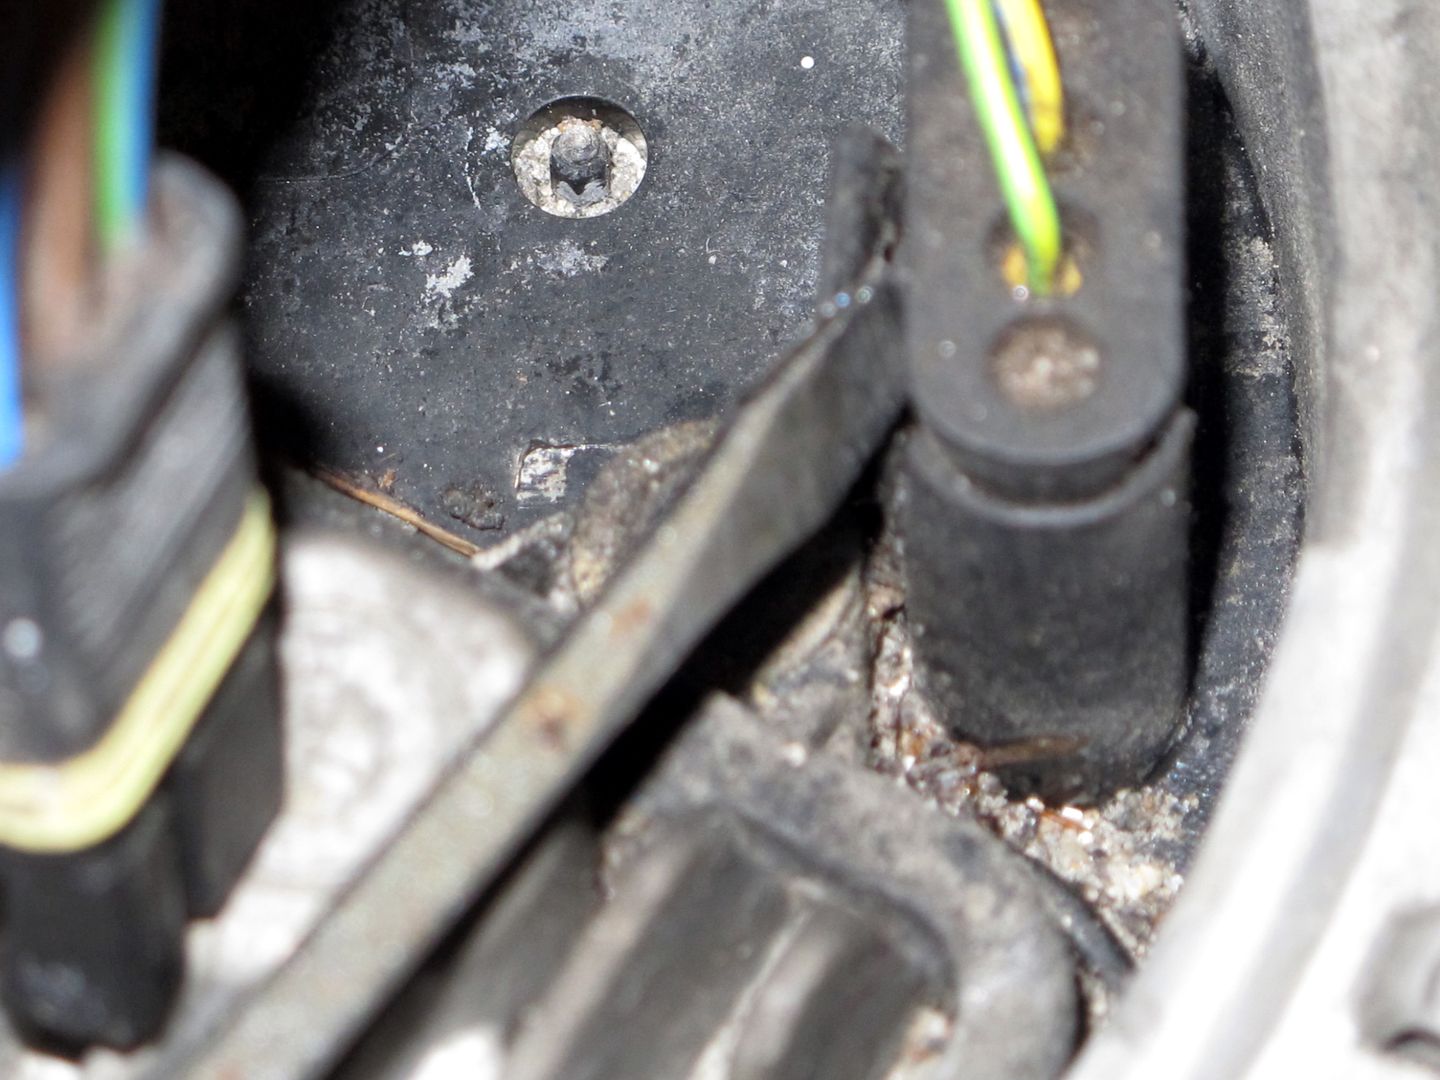 Pull the power plug to the fuel controller and the plug to the tank level gage. The pop the plastic disconnect loose.  You can see the cracks on mine. It is not leaking (yet)!  Use a 19mm wrench to remove the female QD. There will be fuel floating in the intake, and some of the sealant will mix with it.  Remove the fuel and clean the sealant. I used an old acid brush cut tight and shortened the handle to clean it. 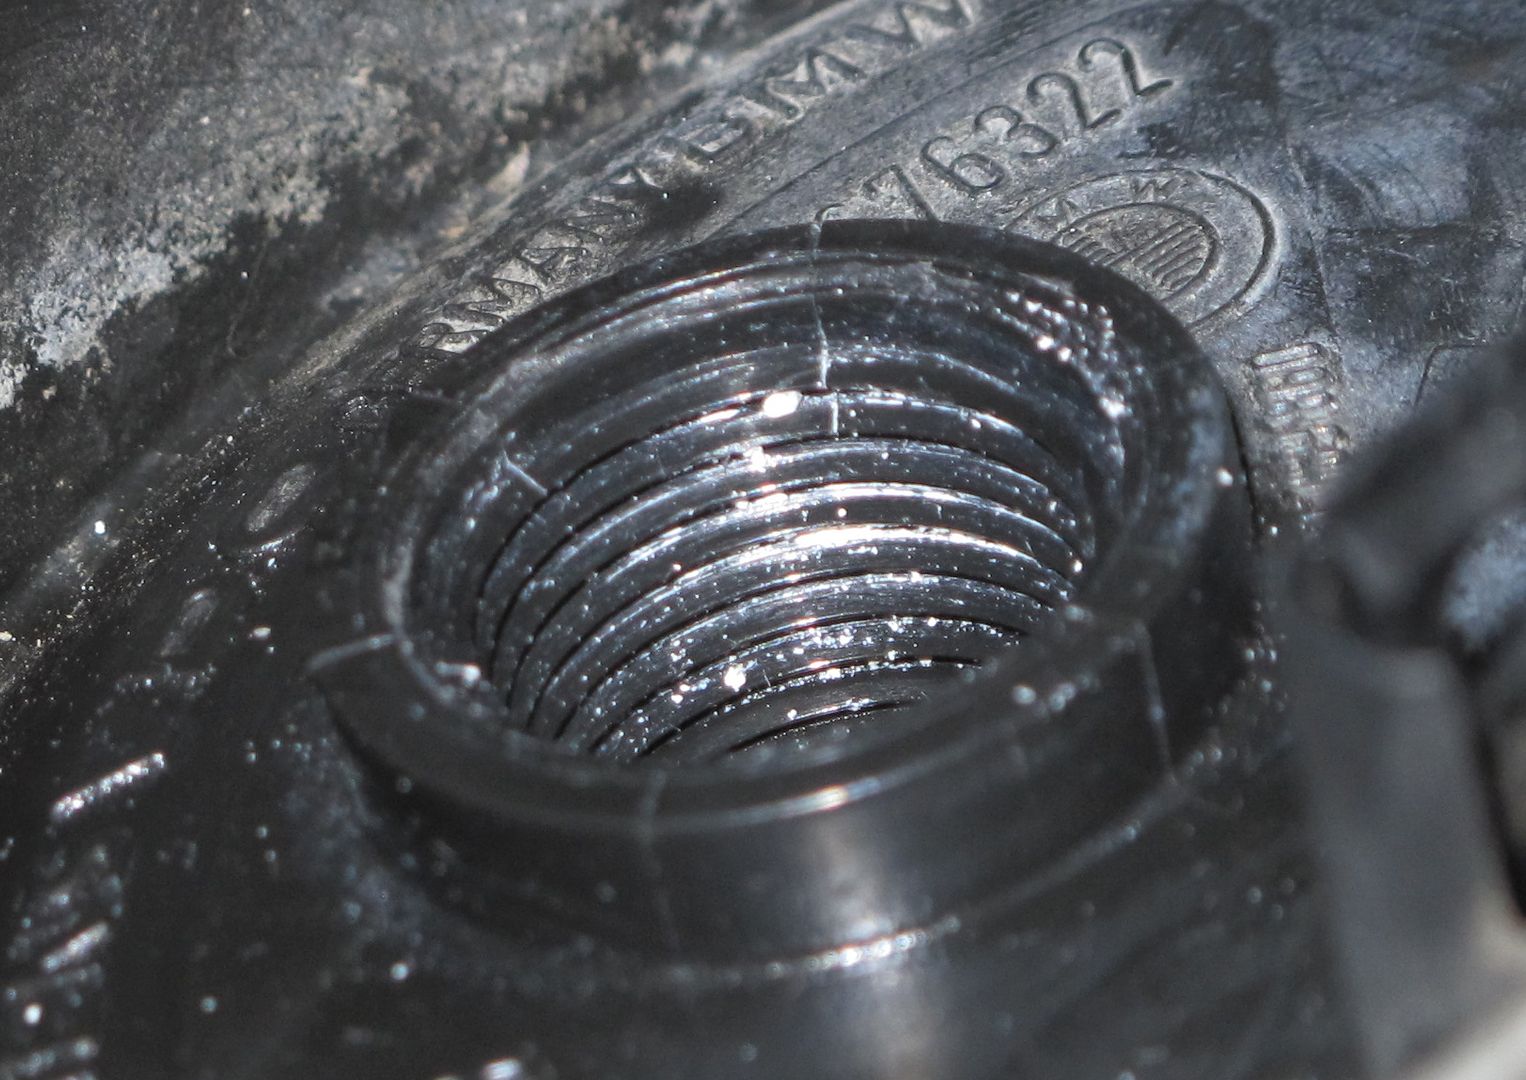 This is clean enough to move forward. Notice the cracks are fairly far down the boss. 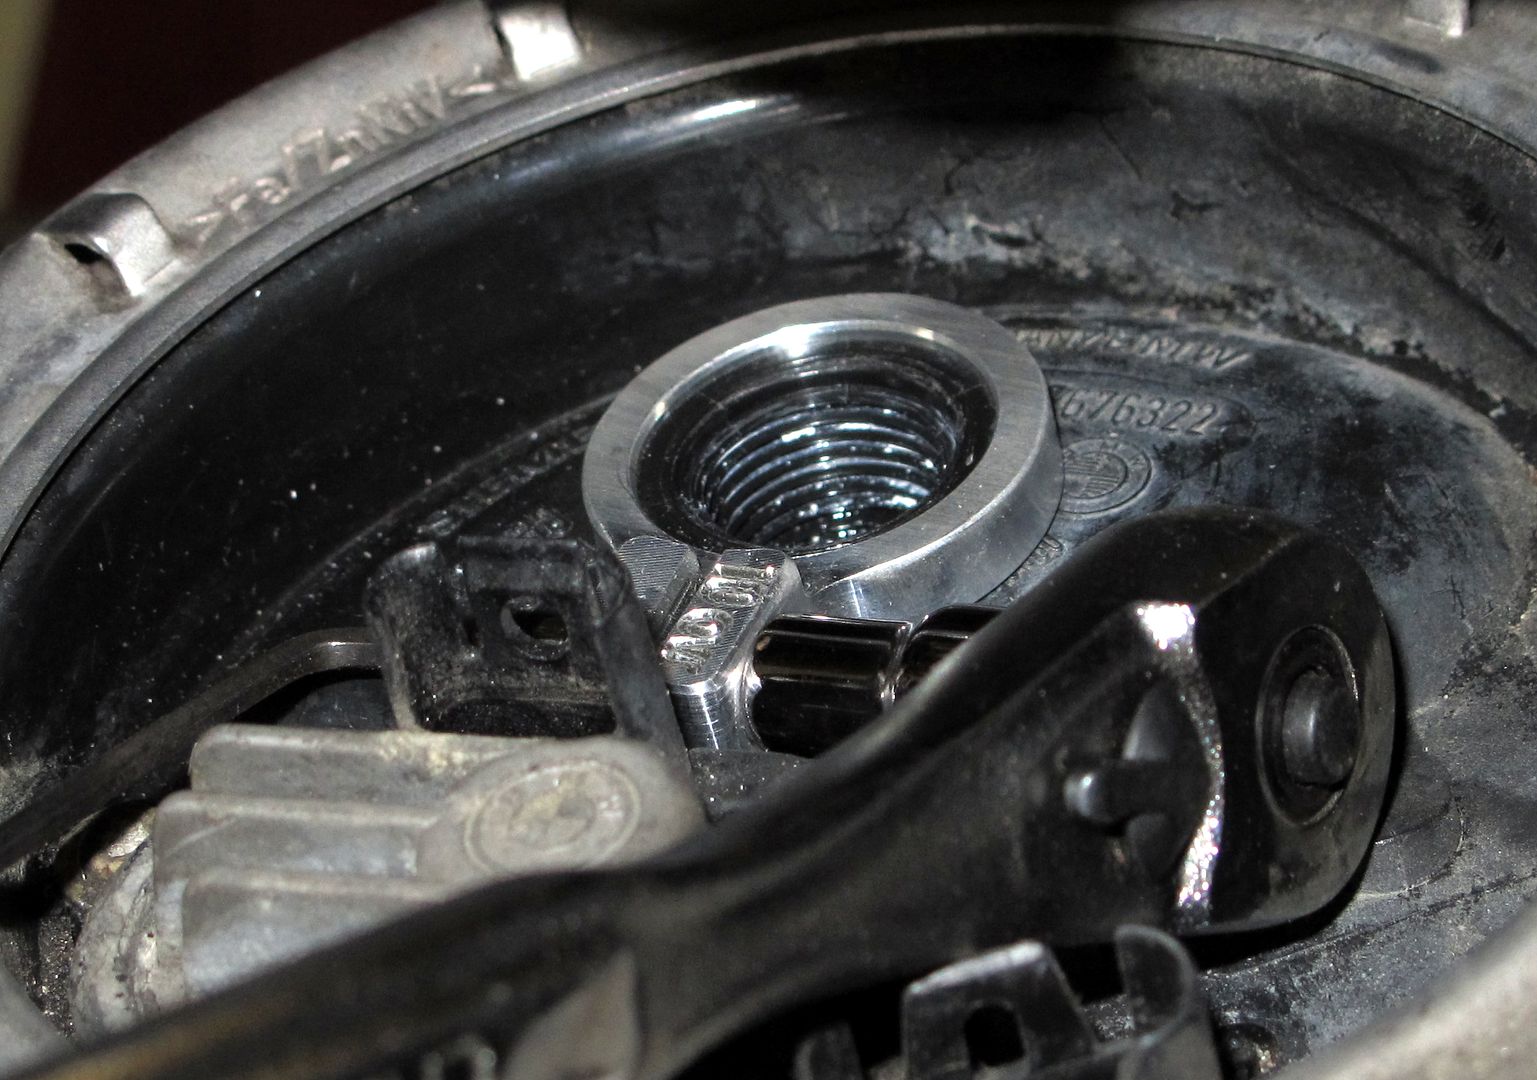 Pre-tighten the clamp so there is just a little slack in the nut/bolt combination, then squeeze it over the plastic boss. Snug it lightly. This is a 2.5mm Allen and a 5.5mm socket or wrench. 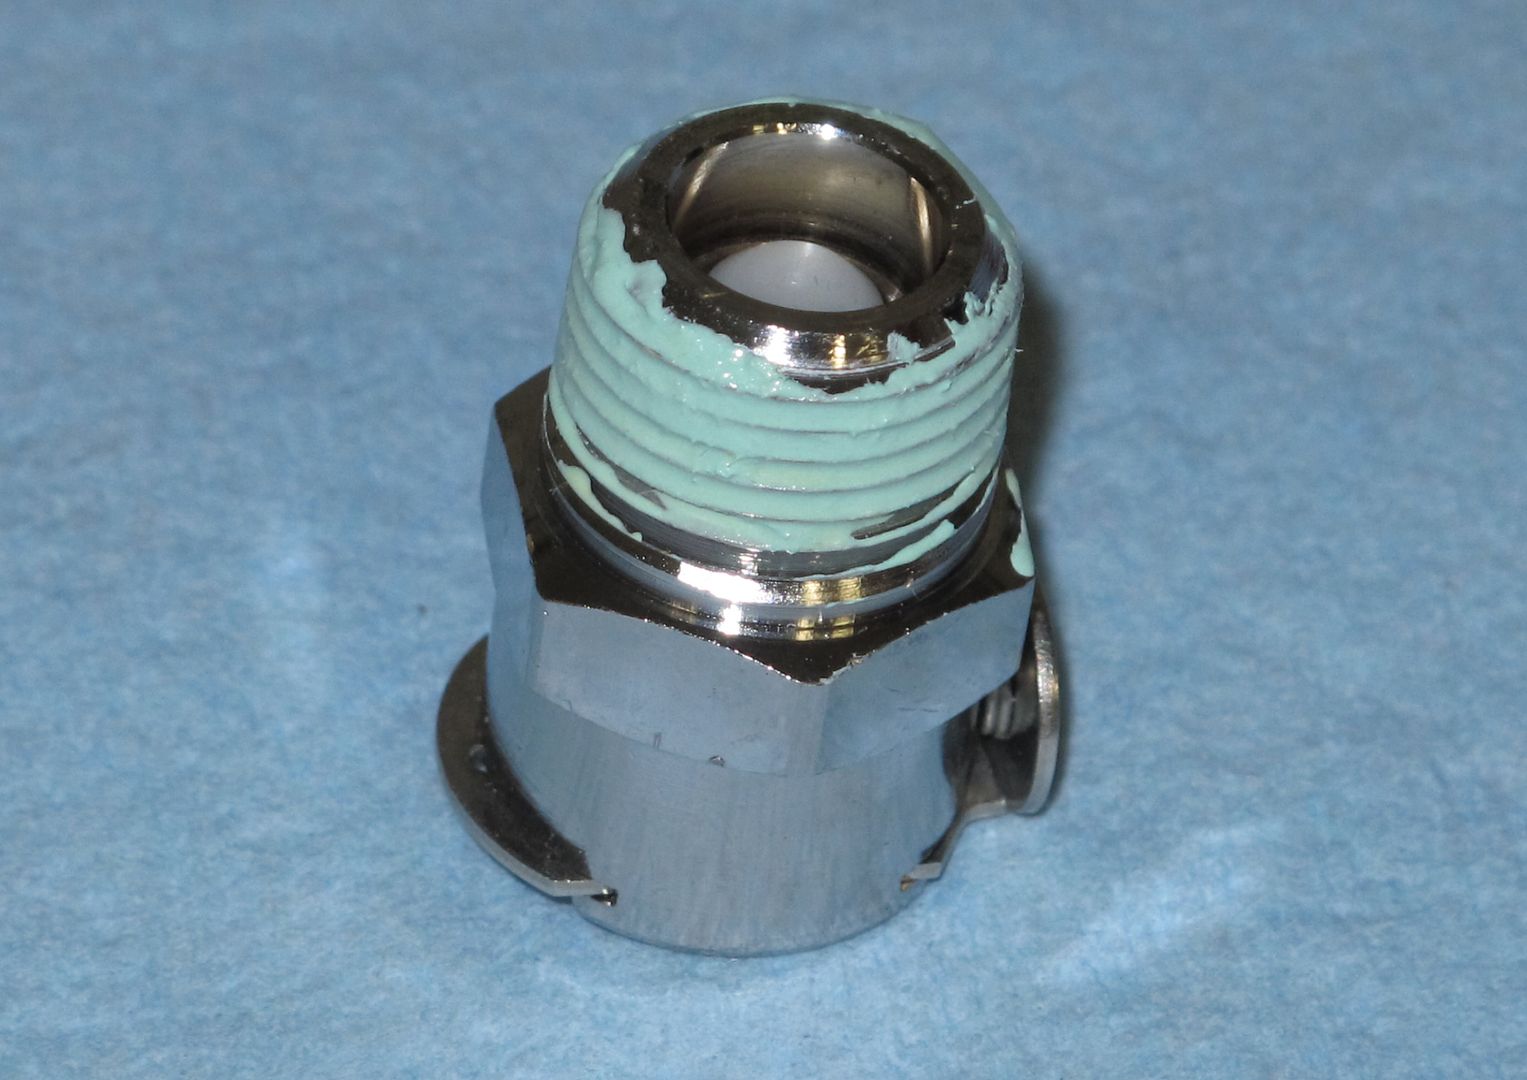 Use some of the supplied sealant to cover the threads of the new female QD as shown. It doesn’t need to be excessive, just this much will do. (Let it sit at least 10 minutes to firm up.) 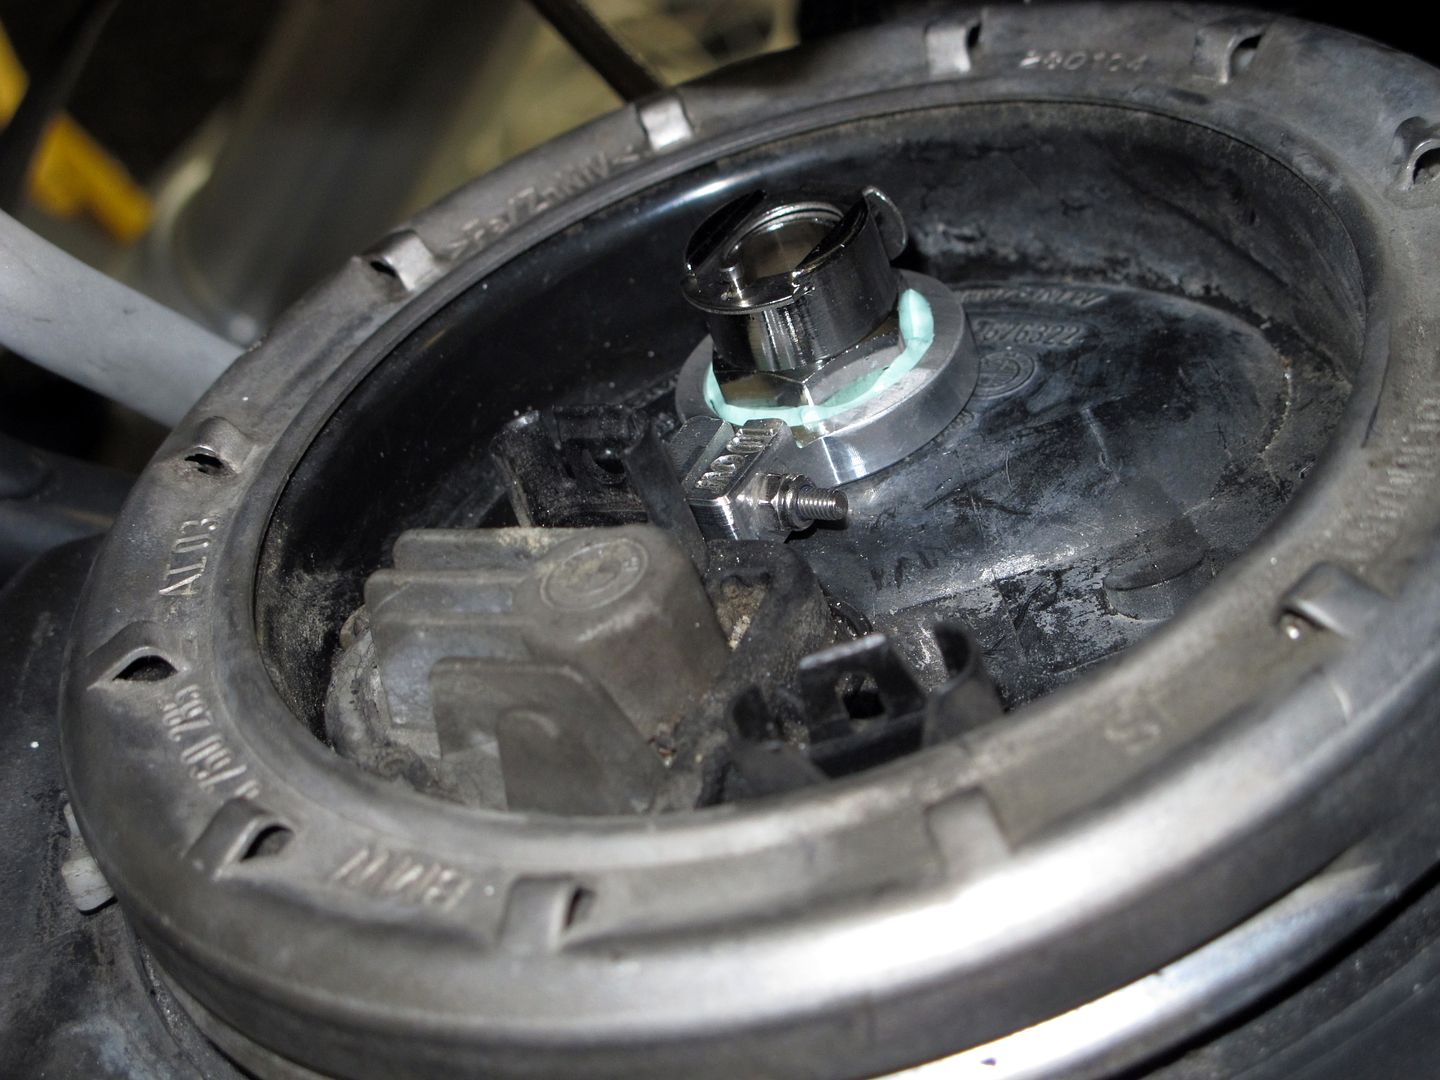 Thread the female QD in and snug it down semi-firmly. Remember, this is plastic you are threading into, and it has sealant. Do NOT over tighten it. Once you have the QD snugged down, tighten the clamp a bit more. No need to tighten it more than the QD, just semi-firmly. (If you are a gorilla, use two fingers to snug it down!) I have only a few photos of the next parts. Use a small standard screwdriver to spread the factory hose clamp. Work it back and forth until it has enough slack to slide the clamp down the hose. 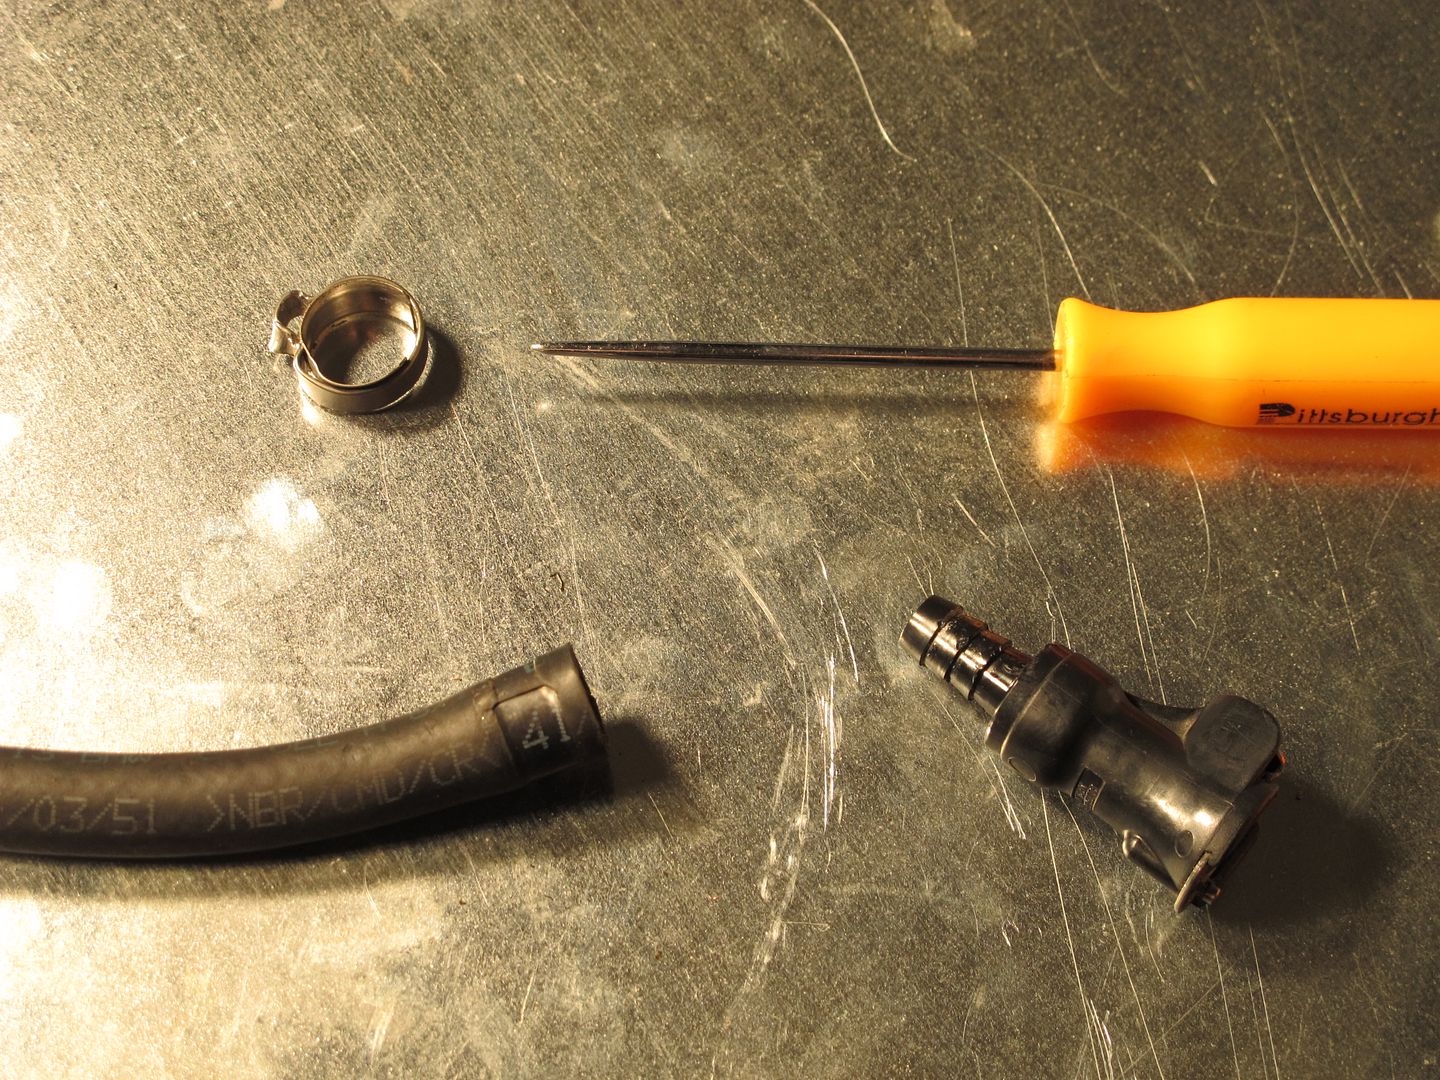 Then take a straight pick and slide it into the male QD between the QD and the hose. (This is critical to loosen up the hose and allow it to come off.) Work it all the way around, then grab the hose with a pair of pliers (I used thick needle nose) and the QD with a pair of standard pliers. Twist and pull until they separate. Note: If the hose shows any signs of cracking or dry rot, replace it with the appropriate fuel line. Press in the new male QD, put the new clamp on first, then firmly snug the clamp on the hose. Make sure that you have the QD properly oriented before you tighten it down. 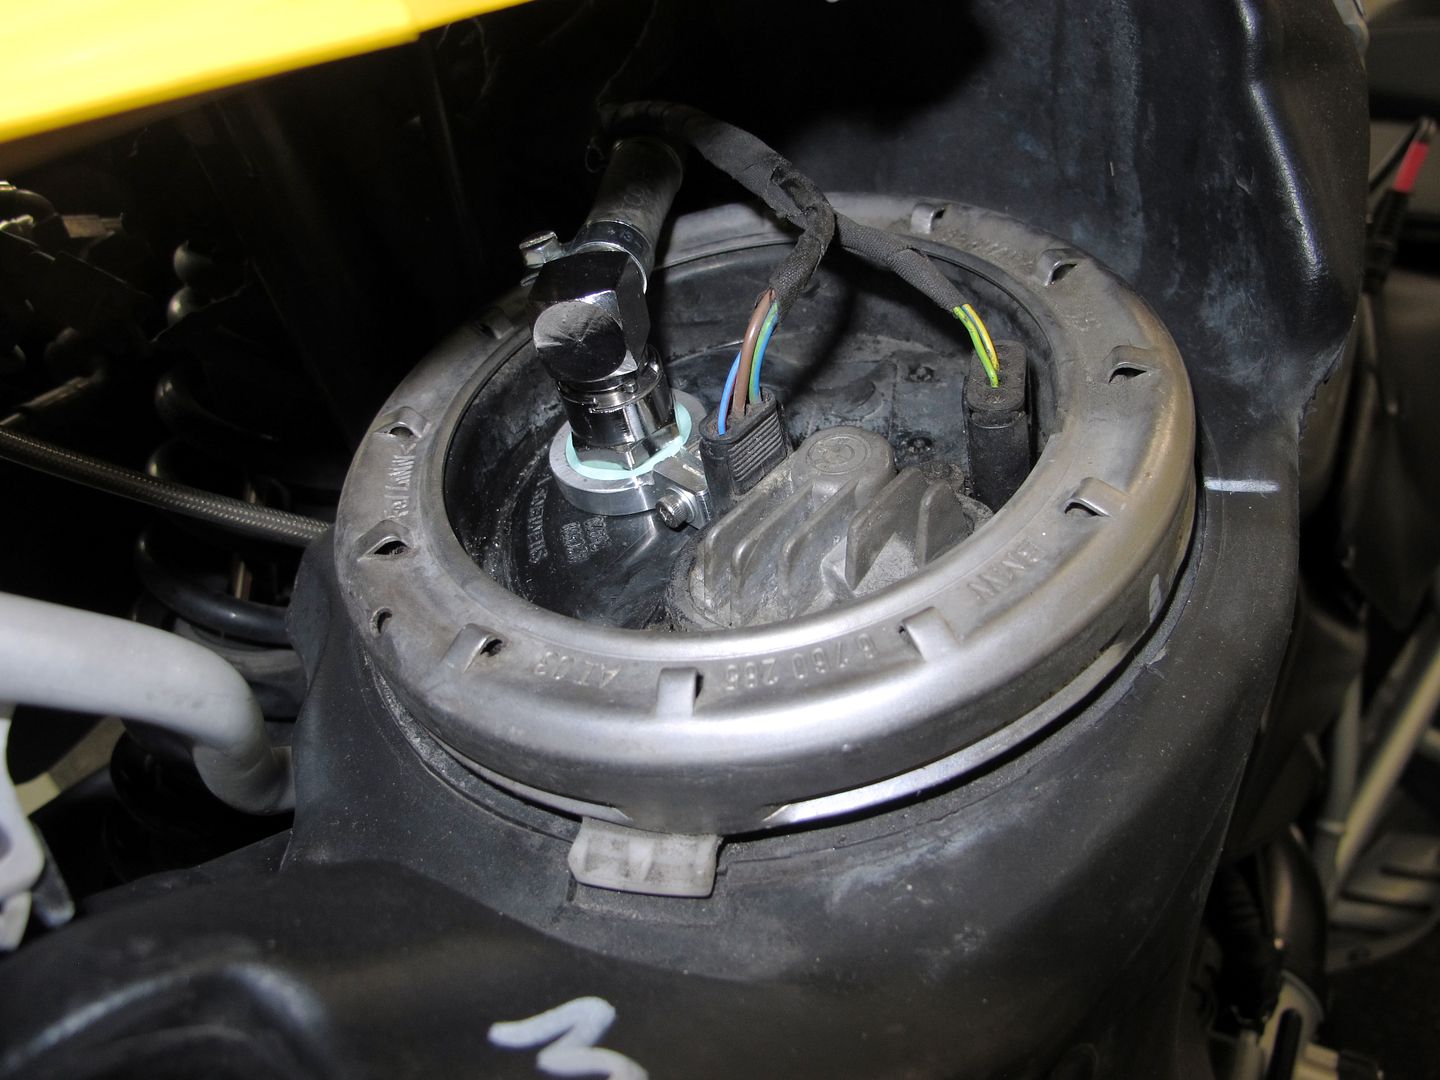 Press in the new male QD to the female QD and install the two electrical plugs. If you have two in the left side, do the second one before mating the male and female sides and plugging in the electrical plugs. Note: Completing the right side QD it is critical that you make sure the fuel level is lower than the plug. If you have right side plugs, please read on. 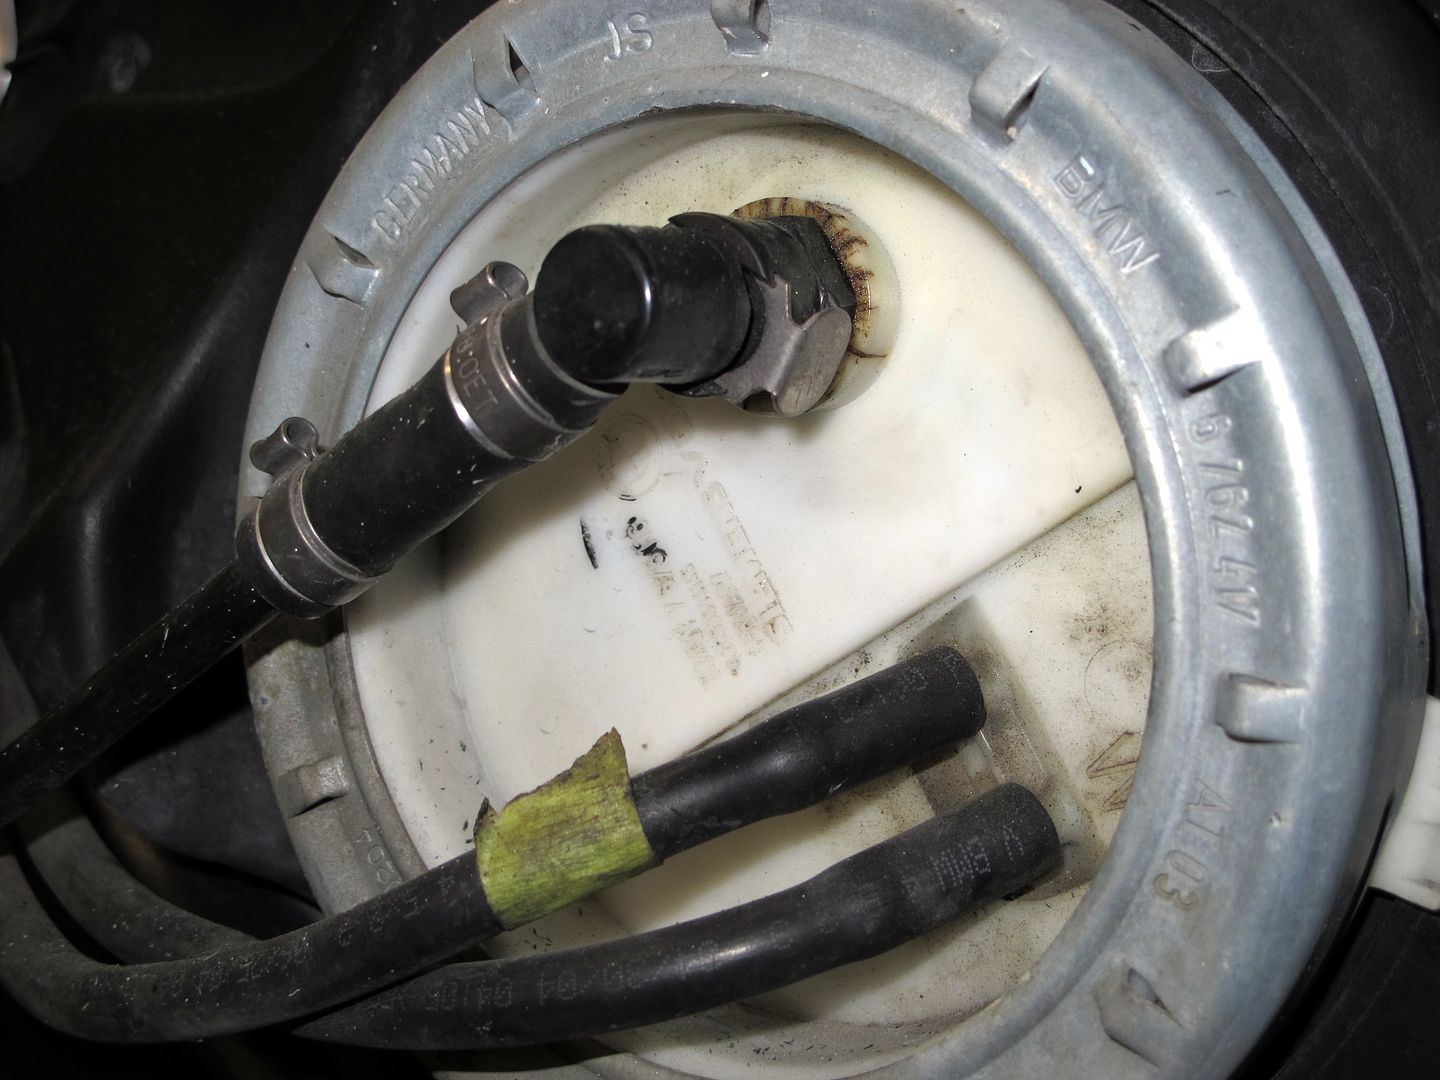 Stock QDs on the left side. You can see the cracks in the white plastic plainly. The process is the same as the left side. 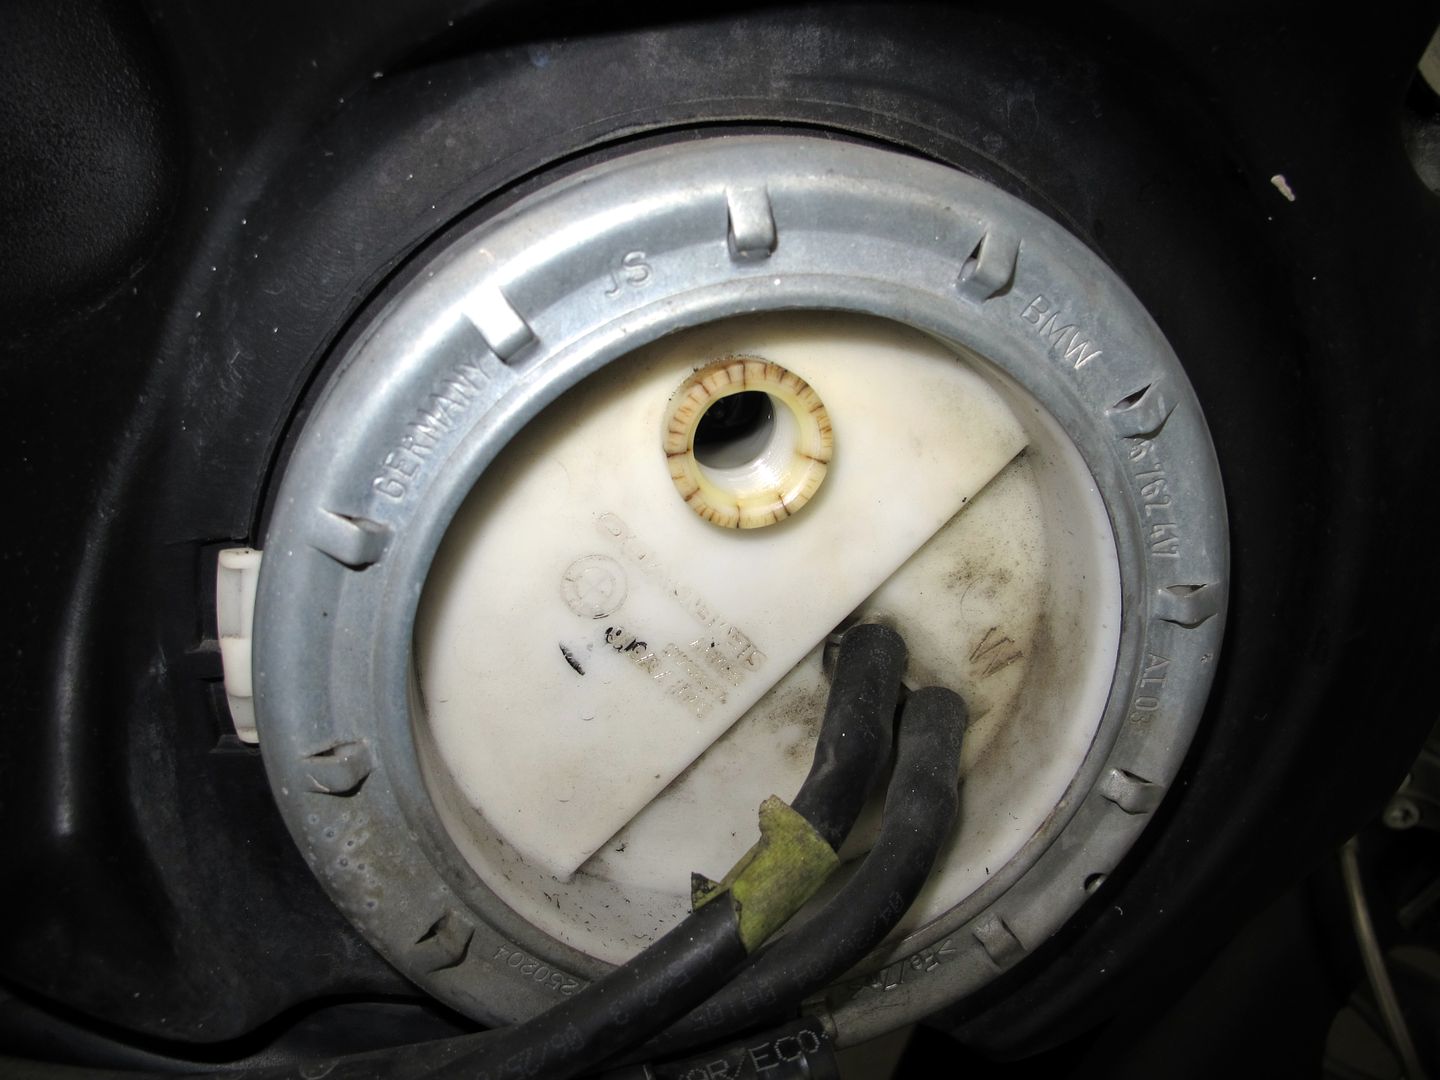 Unscrew the female QD. Use a 19mm wrench to loosen and remove the female QD. 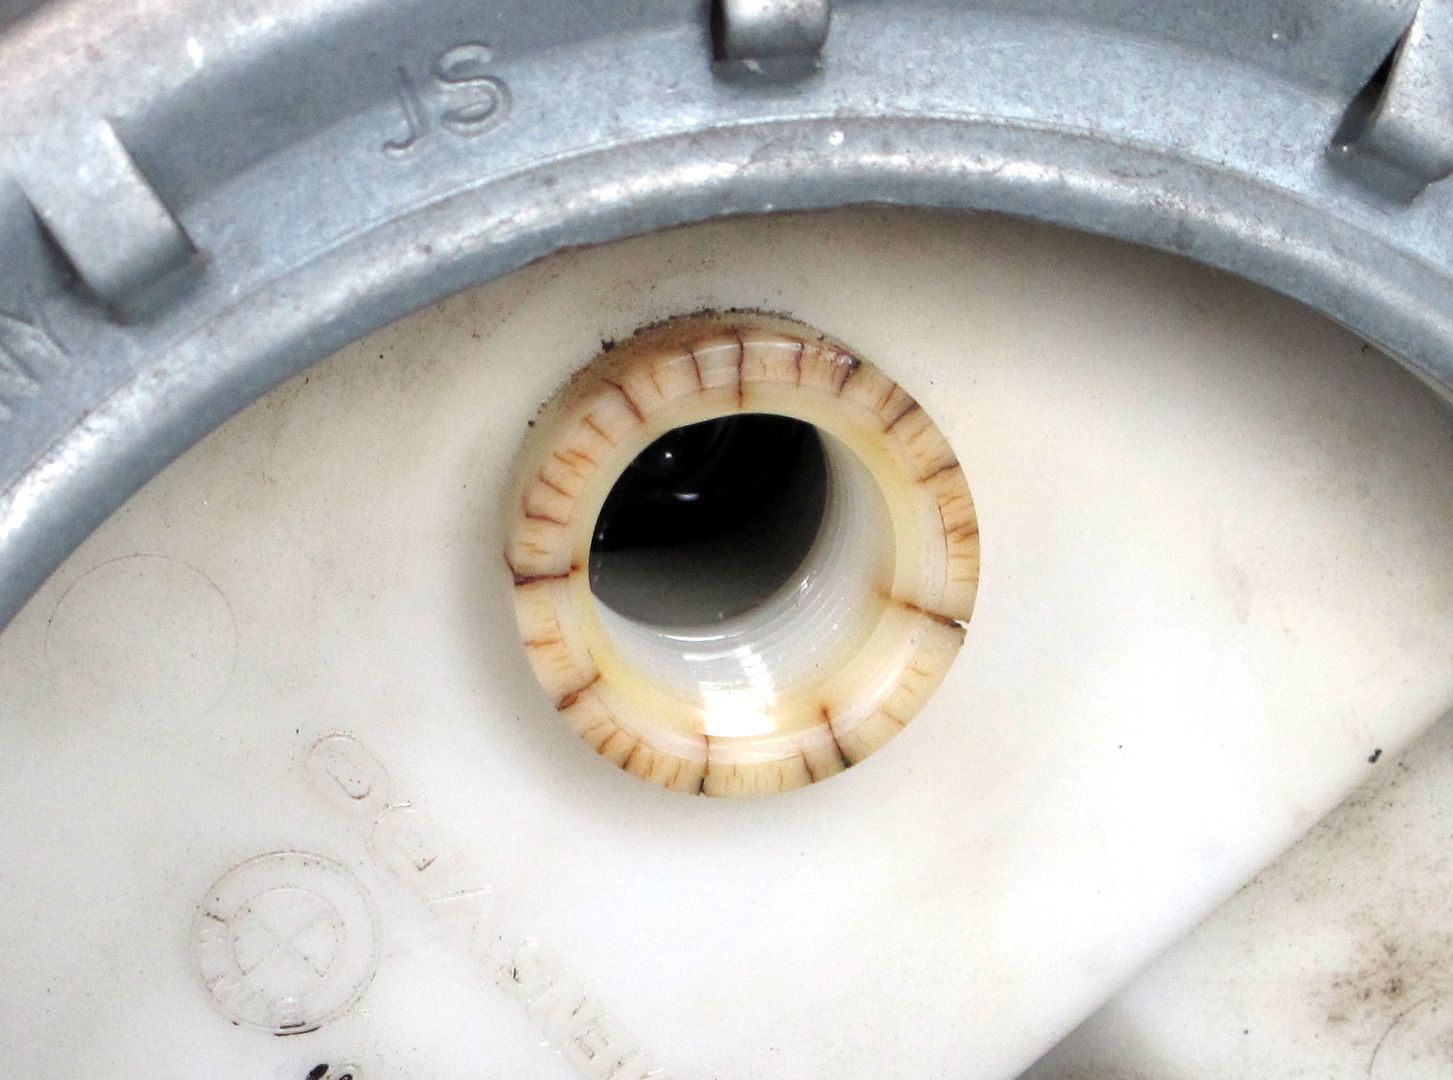 The cracks are deep, as you can see there is even air showing through the crack at the 4:00 position. Fortunately this is a return, so less pressure causing leaks. 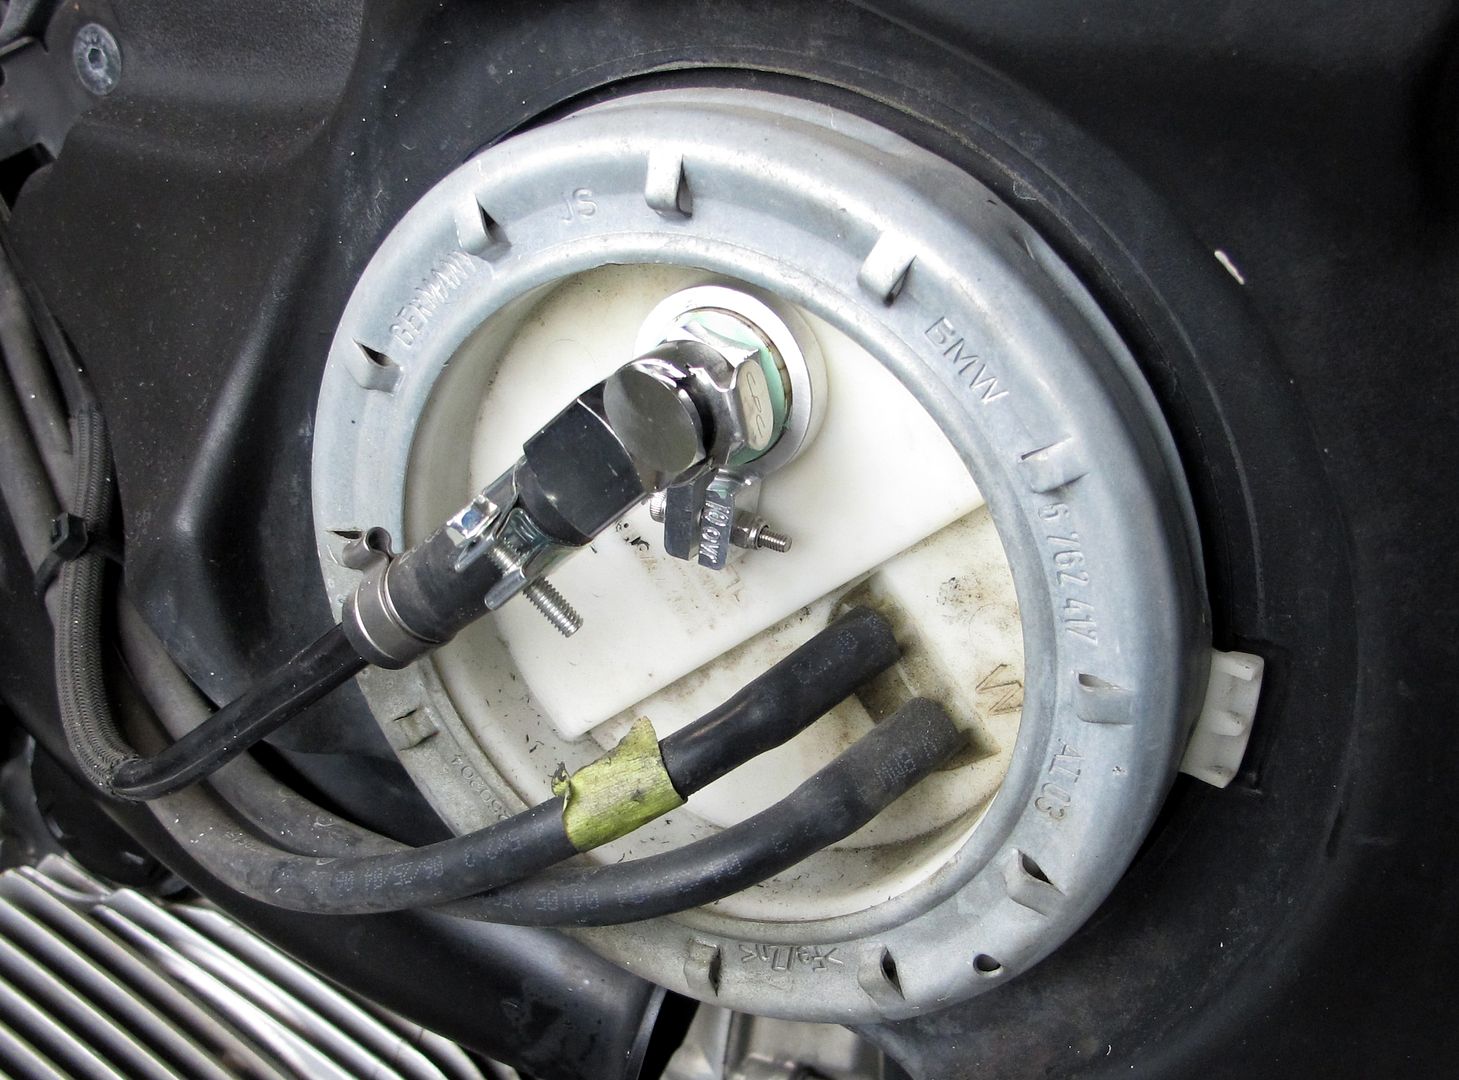 Do the same as previously described: Work off the old hose clamp then hose. Then install the new QD, clamp it on, and reinstall it on the female QD. 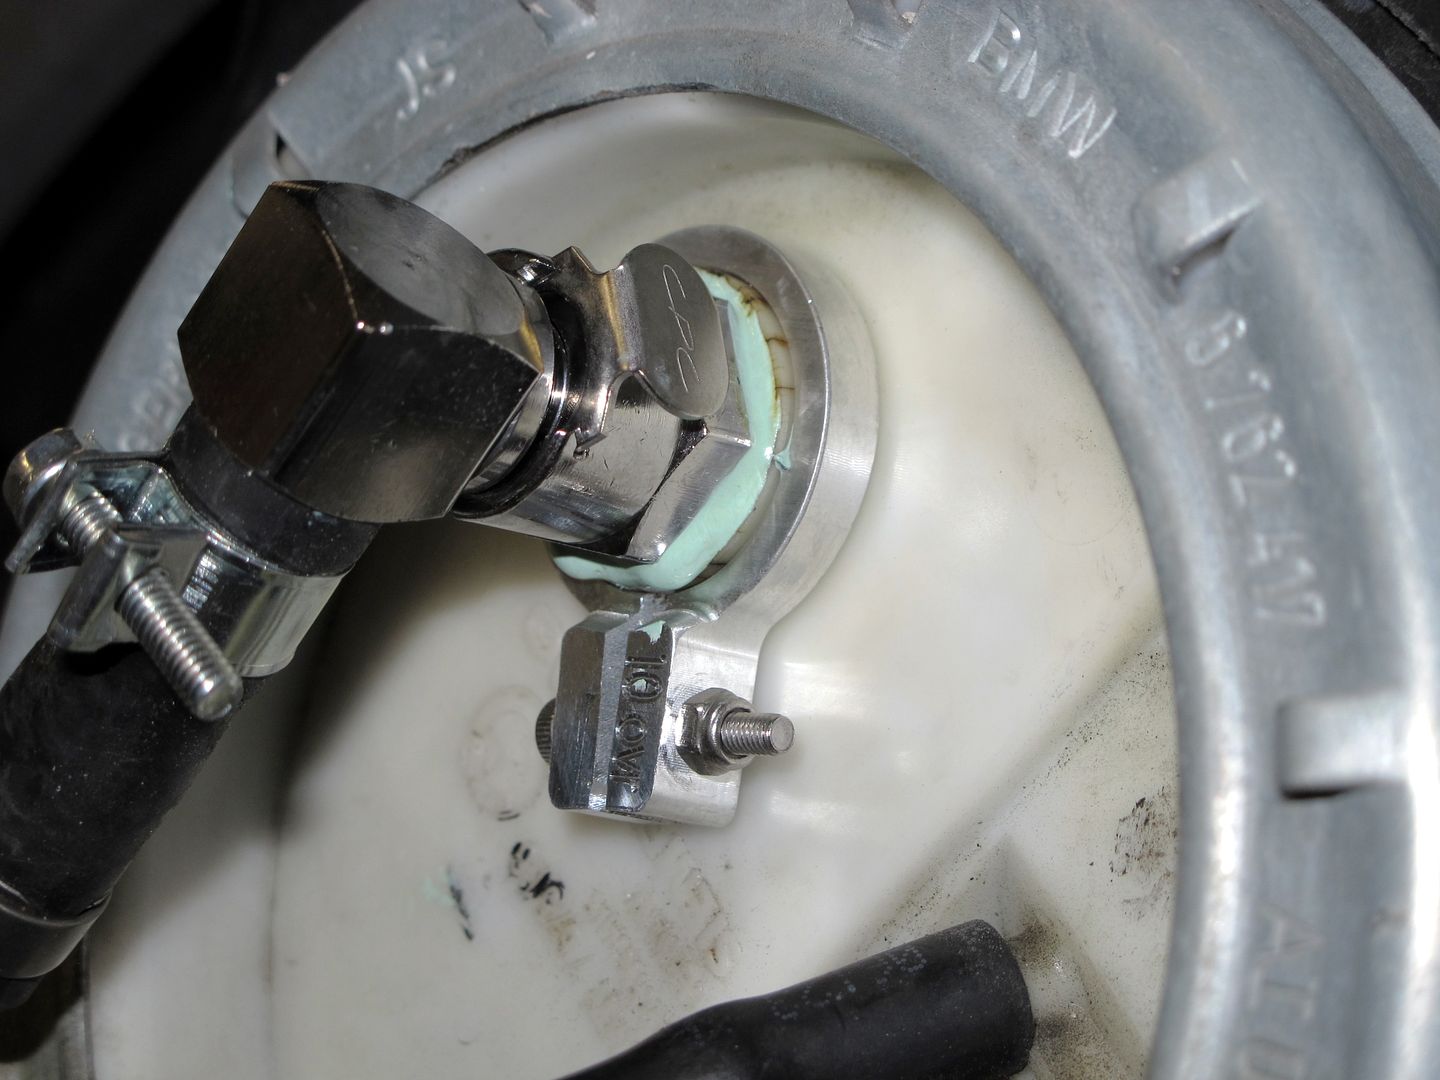 Close-up of the newly installed QD’s. Once both are installed and connected you can fill the tank back up. Non-pressure test will show leaks on the right side if done incorrectly. Once the non-pressure test shows no leaks, start the bike and check the pressure side (left side) for leaks. Double-check the right side as well. 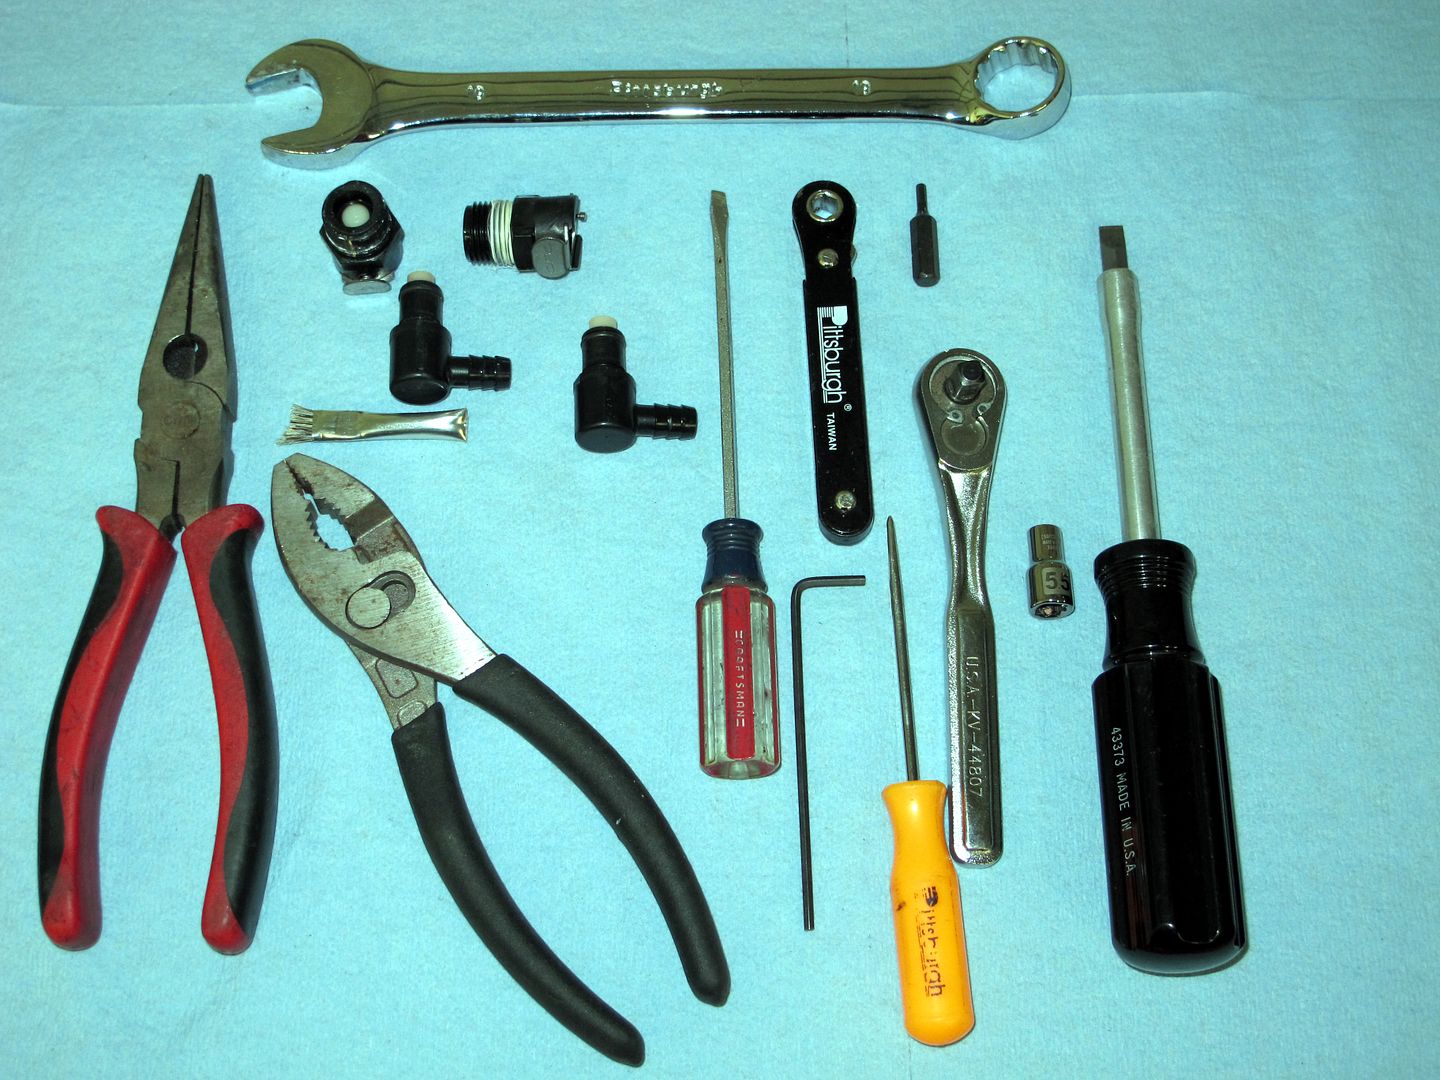 These are the tools, and old parts, from my change out. If no leaks, reinstall the fuel pump cover. Then the side covers. You are done. Jim 
Last edited by xurxes; 30-01-2013 at 23:40.
|
|
#36
29-01-2013, 16:29
|
|||
|
|||

|
|
#37
30-01-2013, 18:49
|
|||
|
|||
|
Μπιλάκο βλέπω το έχεις πάρει πατριωτικα!!!
 λοιπον,,,,γιατί να βάλω το μεταλλικό΄αυτό ματζαφλάρι...οταν,,, α)σχεδον τσαμπα βάζω tyreup... β)με λίγο παραπάνω βάζω εποξική 2 στοιχείων και γίνεται ΠΕΤΡΑ.... γ)Συνδυάζω και τα 2 παραπάνω αλλα πάω και για ψυχανάλυση  εχουμε και λέμε,,,, το παλικάρι απο το Περιστέρι ΔΕΝ μπορει τελικά να μου φέρει τους πλαστικους.... συνεπώς ψαχνόμαστε για usa με βαλβίδα επιστροφης  μιλάω για πλαστικούς και μόνο!!! μιλάω για πλαστικούς και μόνο!!!(για τις διαστάσεις που ρώτησες ο καλός μου ρουφιάνος Ακα boxer εχει ενημερωθεί και ΜΟΛΙΣ σταματήσει το σφουγγάρισμα ας μας τις γράψει  ) )
|
|
#38
30-01-2013, 21:54
|
|||
|
|||
|
Απόσπασμα:
Mπιλάκο άμα σου γίνει ΠΕΤΡΑ, να δω πως θα τον βγάλεις αν, χτύπα ξύλο, ξαναχρειαστεί.
|
|
#39
30-01-2013, 22:54
|
|||
|
|||
|
Απόσπασμα:
Xaxaxa!!!!! Εννοώ να βαλεις εποξικη κολλα απ'εξω...στο χείλωμα!!!!!! Οχι στο σπειρωμα
|
|
#40
30-01-2013, 22:57
|
|||
|
|||
|
Απόσπασμα:
|
|
|
|


 τον έγραψα!!!


 Αλλαγή σε γραμμικό τρόπο

